Makerspace Update

Back in April of 2016, I started a kid-friendly makerspace in our computer lab. This is an unstaffed area that houses a variety of maker supplies for kids to utilize. Every month, there is a different makerspace challenge; however, kids (and teens and adults) are encourage to use the supplies available to create whatever they can imagine.

Since this makerspace has been running for well over a year now, I figured it’s time to do a makerspace update.

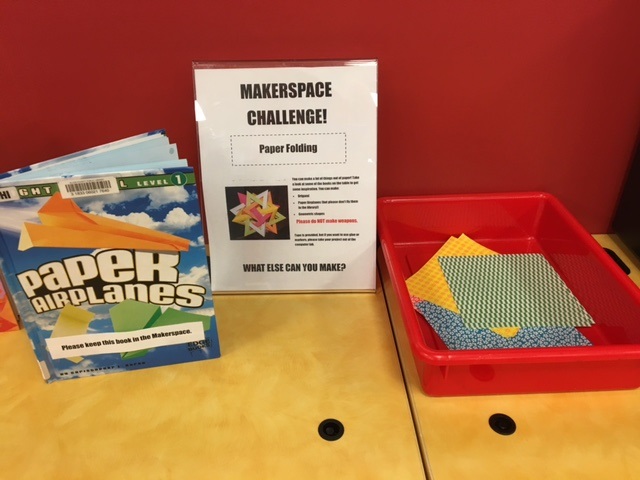
Makerspace Challenge is still going strong:

The makerspace challenges continue to be popular. My favorite challenge so far was a Build a Bird’s Nest challenge that I did in the spring. I had a couple of books on birds’ nests out at the makerspace, and I stocked a tray full of “nature” supplies. Ideally, I would have used actual sticks and leaves, but because materials go so quickly (and I don’t always have time to collect nature objects), I ended up using popsicle sticks for sticks, die-cut leaves for leaves, and craft feathers for feathers.

Less is more:

When I first started the makerspace, I made sure that it was as full of a wide variety of supplies as possible. However, since this area is unstaffed, I quickly learned that it’s best not to have too much stuff out. The more supplies you have, the bigger the messes will be:

Special or seasonal supplies are fun:

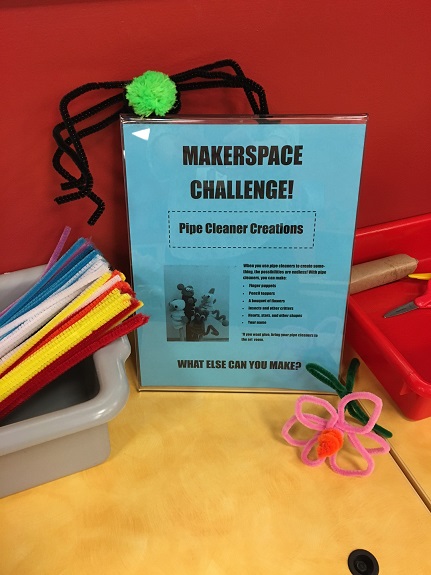
There are certain supplies that are always out. Tape, scissors, pipe cleaners, and popsicle sticks are the norm for the makerspace. But every now and then, I like to change things up by adding something new and fun. For a few days during the summer, I had sea shells in one of the drawers. One weekend, I brought out the big, sturdy cardboard tubes. Kids went nuts one day when I added some mylar sheets. It’s always fun to see what kids will build with these different supplies.

Dreaming BIG:

I’ve been spending some time thinking about how I want the makerspace to grow, and the dream is for it to someday be a staffed area where we can utilize other supplies, such as little bits and 3D printers. Due to staffing levels, I think that will remain a dream for a little while, but there are some exciting changes that will hopefully happen. For example, my department FINALLY got its own 3D printer (I have been trying to get one for our department for YEARS now). I already offer 3D printing classes, but now that I actually have a printer for the department, I’m hoping to utilize it by printing some maker supplies (maybe some gears?) for the makerspace, and maybe offering different types of 3D printing programs. SO EXCITING!!!


Save

Three Makerspace Challenges (July, August, September 2016)

It’s time to celebrate, because I’m back with not just one, but 3 makerspace challenges! I’ve decided that posting about each challenge on a monthly basis is tough, so I’m going to try posting 3 challenges quarterly. We’ll see how this goes…

July: Paper Folding

July Makerspace Challenge Paper Folding

While July isn’t as busy as June, it’s still a month in which a LOT of kids are hanging out in the Children’s Department on a daily basis (except for the weekends…we’re dead on the weekends in the summer). Since I knew we’d be busy, I needed an activity that was cheap, simple, had a huge kid appeal, and was easy to stock. Paper folding met all of that criteria.

I bought some origami paper, placed some paper folding books out at the makerspace, and let the kids have at it! I will say that while there were plenty of kids who tried their hands at origami and paper airplanes and other forms of paper folding, there were also a lot of kids who preferred to just cut a bunch of shapes out of the paper. And that was fine with me.

August: Mystery Bags

August Makerspace Challenge Mystery Bags

I was very excited for this one! I love the idea of giving kids an open-ended challenge, and mystery bags are perfect for this kind of activity! I filled the bags with a random assortment of supplies and told the kids that they could only use what was in their mystery bag + scissors + tape to create whatever they can imagine.

This one was a HUGE hit with the kids! I would put three bags out in the morning, and usually by afternoon all three were gone. I even had one child in particular stop by the desk on her way out to tell me out much she liked the mystery bags. Will definitely be doing this one again.

September: Straw Sculptures

straw-sculptures

Straws are a staple in the makerspace, but the straws that we usually use are clear. For this project, I went out and bought colorful straws in a variety of sizes to make the challenge more fun. I also throw in some colorful pipecleaners as a way for children to construct their sculptures, though they also use tape when they don’t want to use pipe cleaners.

I’ve been gone on vacation for most of the month (and the month isn’t over yet), so I can’t say how popular this one is, but a group of girls did make some straw pyramids, which they then put on their heads to become unicorns, so I know at least some kids are having fun with it.


Makerspace Create: Tensile Bubbles

Tensile Bubbles Group

The end of Summer Reading always kicks my butt, which is why I’m typing this post up at the beginning of August instead of the beginning of July, which is when I actually offered the program.

So, yeah, at the beginning of last month, I offered my second Makerspace Create program.  Once again, I needed something that was appropriate for a variety of ages. I also needed something that would have high kid appeal, but would be fairly cheap and simple for me. Therefore, I decided to do a tensile bubbles program.

This program was such a big hit! And it was so simple and fun that I’m seriously considering offering it again next year!

Interested in doing a tensile bubble program? Here’s what you need:

Materials:

Instructions:

Prior to the program, cut the straws into relatively equal quarters and fill the containers with a mixture of bubble solution and water (I believe the bottle of the bubble solution recommends 1 part solution to 7 parts water).

I started the program by instructing the group of kids on how to make a pyramid-shaped bubble wand with pipe cleaners and straws. Afterwards, I gave them some time to create their own bubble wands in any shape they wanted. Once all that was done, we migrated outdoors and spent a good 20 minutes blowing bubbles.

I highly recommend blowing the bubbles outside as opposed to inside. The bubble solution was WONDERFUL, but very, very soapy.

Makerspace Challenge: Pipe Cleaner Creations

Pipe Cleaner Creations

June’s Makerspace Challenge was pipe cleaner creations, and it was a huge hit! As a matter of fact, the day that I changed the challenge to pipe cleaner creations, a coworker came up to me as I was filling a tub with pipe cleaners, and she said, “Did you stock up on pipe cleaners? Because I can see this one being popular.” And even as she said it, a tween left her computer to come over to the Makerspace and make something!

Since then, I saw a lot of flowers and bracelets and finger puppets, all made with pipe cleaners! I even had one tween make a very realistic pipe cleaner Sonic the Hedgehog!

Sonic the Hedgehog

June is almost over, so in a few days, I’ll be putting most of the pipe cleaners away in favor of a new medium. In the meantime, I can’t wait to see what else kids will make!

Makerspace Create: Exploding Boomerangs

Exploding Boomerangs

Back in April, I started a kid’s Makerspace. It’s been going pretty well, and one of these day I’m going to have to post an update about it, but today is not that day. Today, I’m going to talk about a maker program that I did a few weeks ago that ties in with the Makerspace.

Makerspace Create is a monthly maker program for kids that I’ll be offering at my library. Starting in August, this maker program will be held in the actual kid’s Makerspace, but because we get SO MANY kids during the summer, I held the inaugural Makerspace Create in one of our larger meeting rooms. I also chose a project that was relatively simple, cheap, and could work well with a large group of kids of varying ages: exploding boomerangs.

I got the idea for this project from I Can Teach My Child. If you follow the link, you will find super simple instructions for how to assemble the boomerang.

As for the program itself, here is what I did:

Introduction:

I started the program by talking about boomerangs, what they look like and how they work. I would have liked to add a bit about the cultural and historical aspects of the boomerang, but this program took place during the first full week of Summer Reading, and I just didn’t have time to prepare and research, so I left that out.

I then talked about the boomerangs that we would be making. I explained that the explosion wasn’t a chemical explosion with a puff of smoke (and there were some groans at that). Next, I demonstrated how to put the boomerang together. This demonstration is tricky and almost impossible for a large crowd, particularly because I can only do the fourth part by placing the boomerang on a table. Still, the kids got the basic gist of it.

Boomerang Assemblage:

My program helper and I passed out little baggies that each contained 4 Popsicle sticks and instructions. I told the group to follow the instructions to make their boomerangs and to raise their hands if they were having trouble.

Some kids caught on quickly and were able to assemble their boomerangs all on their own in a matter of minutes. Others were able to follow the first three steps and understood how the fourth step worked but didn’t quite have the fine motor skills for it (it is tricky…even for me). And a few were just plain lost.

Because kids were at different skill levels, there were a few minutes of frustration as the ones who had their boomerangs assembled were impatient to try them out, but we had enough kids who still needed help that my program helper and I were too busy to organize lines for the exploding part. Therefore…

If you plan on doing this program and expect a large group of kids, you may want to either have extra helpers on hand, or have a simple craft (maybe coloring paper boomerangs?) that kids can work on if they assemble their boomerang quickly.

Time to Explode:

After everyone was ready, I had the kids form three lines, and they took turns throwing their boomerangs at the wall and watching them explode. Some of the explosions were spectacular, with sticks flying everywhere, and there were a couple of times where the boomerang wouldn’t break a part, and I would congratulate the builder for making a super strong boomerang and give him/her another turn.

Once the boomerang(s) exploded, the owners would rush forward to collect their sticks, and I had a rule that the next person in line couldn’t throw theirs until everyone was out of the way. Kids would then assemble their boomerangs again and run to the back of the line.

We spent about 15-20 minutes exploding the boomerangs before I called for one last throw in which several kids lined up and threw their boomerangs all together. The kids were delighted to hear that they could take their boomerangs home, but I did tell them to ask their grown-ups about where they’re allowed to throw them.

Overall Assessment:

There are definitely some things I would do differently if I offered this program again. I would definitely add a little bit about the culture and history of the boomerang at the beginning, and I would make sure to have a project for kids to work on while they waited for others to assemble their boomerangs. But other than that, this program was a big hit with most of the kids, who loved the process of building something and then destroying it only to build it again.

Makerspace Challenge: Not a Stick

Not a Stick

This month’s makerspace challenge was inspired by one of my favorite picture books! I originally wanted to do Not a Box, but I didn’t have enough boxes to last for an entire monthly challenge. I did, however, have plenty of Popsicle sticks. So…

Because the makerspace is all about creativity, I left this challenge completely open. I basically pulled the book for inspiration, threw a bunch of Popsicle sticks, notched sticks, and old fashioned clothes pins into a tub, and let the kids have at it.

Not a Stick 2

I honestly can’t tell you if this challenge is going over well with the kids or not. May is a bear of a month for the Children’s Department. Between some vacation days and working on SRP stuff, I feel like I haven’t really had time to pay attention to the makerspace, aside from making sure that it stays stocked.

But I will say that A LOT of the Popsicle sticks have disappeared, so they’re obviously being used for something!

Makerspace Challenge: Friendship Bracelets

Makerspace Challenge
As I mentioned in my last post, I started up a kid-friendly makerspace at my library. This makerspace is open all day and kids are encouraged to use their creativity to make whatever they want. However, I also decided to have a monthly challenge for those kids who either 1) likes a challenge, or 2) needs a little help coming up with something to make.

I wanted this month’s challenge to be something simple that required little to no prep work on my side. I also wanted it to be something that had kid appeal so that it could entice kids to use the new makerspace. So this month’s challenge is…

FRIENDSHIP BRACELETS!

A few things of note:

  1. My typed up instructions are for the traditional braided friendship bracelets, but I did put out several books on friendship bracelets for those who wanted to do something more challenging.
  2. Rainbow loom bracelets probably would have been more popular. I’m showing my age with the traditional friendship bracelet thing.
  3. We initially kept the thread at the computer sign up desk because we were afraid that it would go too quickly. A few kids asked for the thread, but mostly it just sat on the desk. After the first week, I moved the thread into the makerspace, and more kids have been participating in the challenge.

friendship bracelet thread
I’ll be changing the makerspace challenge every month, and it’ll be interesting to see which challenges will be popular and which ones will be ignored in favor of the child creating his/her own project. As of right now, I’d say that the friendship bracelet challenge has had a mild to moderate response. But that doesn’t necessarily mean that I wouldn’t do it again in the future.

A Makerspace for the Younger Crowd

After years of wishing and months of planning, I finally managed to start up a kid-friendly makerspace at my library! The makerspace has only been out for about a week now, but it’s gotten a decent amount of use and some positive feedback. One grandmother thanked me for the makerspace because her 4-year-old grandson got the opportunity to work with another little boy on a project that they came up with together. Later that same day, a tween deemed the makerspace “pretty cool” which, as we all know, is pretty high praise!

The makerspace is set up in our computer lab, which is where the majority of kids end up at some point during the day. The supplies are out all day and kids are encouraged to use the makerspace whenever they want. I did type up a set of makerspace rules that include: 1) Be kind, 2) Share, 3) Be safe, and 4) Clean up.

The makerspace consists of a set of drawers stocked with supplies such as:

  • Masking tape
  • Yarn
  • Pipe cleaners
  • Plastic tubes
  • Popsicle sticks
  • Scissors
  • Soufle cups
  • Coffee filters
  • Wheels/Turbine Hubs
  • Cotton balls
  • Styrofoam balls
  • Straws
  • Paper scraps
  • Hole punch

There are also trays of cardboard and paper towel/toilet paper tubes for the kids to use.

I’ll be posting more later this month (or early next month) about what works, what doesn’t, and what plans I have for the future. In the meantime, I’m just happy to share that I have started this project and that it’s going well so far!